I'm here in Vancouver BC and stopped by a shop called Velocity Cars. It is a car lot that sells some imported Japanese vehicles.
Import laws are different in Canada. These are all legal.
They had 5 Estimas. 2 ACR Estimas, 2 TCR Estimas (like the US previa) and One Estima Emina.

Looked at all of them to see their differences. They are all 8 seaters as well.
First I looked at the Estimas (TCR) that were the same body as the US Previa. Besides the awesome upgrades, one was lowered, but they are the kouki versions, so newer headlights, tail lights and one had the newer Aeras roof rack. Both were AWD. The side mirrors' top were extended like a sun guard.
Obvious difference in the outside, but the inside, pretty much the same. There were some small differences.
1. Rear A/C had more buttons for adjusting flow.
2. The lower tray. US previas had a tray (some didn't). Of course some Canadian models had the cool box set up. The Estima has a tray, but it is raised. The top tray lifts up to reveal a small compartment and on the left side really under the dash, there is also a small compartment. Pretty cool if you are hiding you wallet or something.
Besides admiring the Estima Aeras, I really wanted to look at the Emina. This was my chance to actually get a good look at the differences.
Off the bat, the Emina seems narrower than the Estima. This is known, but this is the first time I actually seen it in person. Since the interior was totally different, I wanted to see for myself.
Inside, the dash is different. The climate control section projects outward. There is that raised bottom tray as with the Estima. Separate cup holders.
The rear A/C is smaller, but the backside has 4 adjustable vents on each side. The sliding door light is HUGE. I mentioned 8 seater right? So middle row seats also has a drop down cup holder.
I figure why not check out the ACR Estima while I was there. Very cool van. Tons of fancy stuff!!! Curtains, sleek dash, trays in the middle row. Very nice looking van.
While I do love the Estimas... I am a fan of vans in general, so I decided to check out the Mitsubishi Delica Spacegear. This is the 4th generation of this van and of course outfitted for off road use.

4th Gen Delicas!

The Emina has different headlights and bumper. Also both windshield wipers are located on the same side.

The ACR Estima Aeras was very cool to check out. Loved the blacked out headlights.
Inside, tons of neat features.

Estima Emblem

Still in love with that Rack!

3 Estimas!
It was really cool to actually get a chance to get a real good look at these vans. To make comparisons and see the differences.
Huge shout out to Velocity Cars in Vancouver BC. Alex is my dude there, so if you are interested in anything, call or visit them and ask for him. He will answer any and all questions.
--------------------------------------------------------------------------------
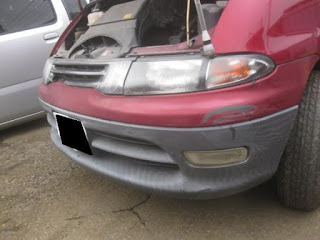
Here is a Lucida (TRC10G ) front end


and rear

Import laws are different in Canada. These are all legal.
They had 5 Estimas. 2 ACR Estimas, 2 TCR Estimas (like the US previa) and One Estima Emina.

Looked at all of them to see their differences. They are all 8 seaters as well.
First I looked at the Estimas (TCR) that were the same body as the US Previa. Besides the awesome upgrades, one was lowered, but they are the kouki versions, so newer headlights, tail lights and one had the newer Aeras roof rack. Both were AWD. The side mirrors' top were extended like a sun guard.
Obvious difference in the outside, but the inside, pretty much the same. There were some small differences.
1. Rear A/C had more buttons for adjusting flow.
2. The lower tray. US previas had a tray (some didn't). Of course some Canadian models had the cool box set up. The Estima has a tray, but it is raised. The top tray lifts up to reveal a small compartment and on the left side really under the dash, there is also a small compartment. Pretty cool if you are hiding you wallet or something.
Besides admiring the Estima Aeras, I really wanted to look at the Emina. This was my chance to actually get a good look at the differences.
Off the bat, the Emina seems narrower than the Estima. This is known, but this is the first time I actually seen it in person. Since the interior was totally different, I wanted to see for myself.
Inside, the dash is different. The climate control section projects outward. There is that raised bottom tray as with the Estima. Separate cup holders.
The rear A/C is smaller, but the backside has 4 adjustable vents on each side. The sliding door light is HUGE. I mentioned 8 seater right? So middle row seats also has a drop down cup holder.
I figure why not check out the ACR Estima while I was there. Very cool van. Tons of fancy stuff!!! Curtains, sleek dash, trays in the middle row. Very nice looking van.
While I do love the Estimas... I am a fan of vans in general, so I decided to check out the Mitsubishi Delica Spacegear. This is the 4th generation of this van and of course outfitted for off road use.

4th Gen Delicas!

The Emina has different headlights and bumper. Also both windshield wipers are located on the same side.

The ACR Estima Aeras was very cool to check out. Loved the blacked out headlights.
Inside, tons of neat features.

Estima Emblem

Still in love with that Rack!

3 Estimas!
It was really cool to actually get a chance to get a real good look at these vans. To make comparisons and see the differences.
Huge shout out to Velocity Cars in Vancouver BC. Alex is my dude there, so if you are interested in anything, call or visit them and ask for him. He will answer any and all questions.
--------------------------------------------------------------------------------
Here is a Lucida (TRC10G ) front end


and rear

Nice work on your blog, you put some time into it.
ReplyDeleteI bought the 98 in your photos
ReplyDeleteHi,
ReplyDeleteI like your videos very much, especially those of your repair work.
I'm driving a 95 Previa S/C in Vietnam.