This is another MUST DO on the previas, especially if you are having issues and code P0401 being thrown. P0401 is "Exhaust Gas Recirculation flow insufficient detected".
Parts:
- EGR intake gasket - 25628-76010 - this is on the far right side next to the exhaust.
- EGR valve gasket - 25627-76010 - used for the EGR valve to the intake manifold.
-Air inlet duct gasket - 22273-76010 - this is where the air goes into the intake manifold and where the EGR port gets plugged.
1 container of coolant

I followed Zenseeker's photo's on every single detail. If you haven't visit his website (http://zenseeker.net/Previa/PreviaMaintenance.htm) Zenseeker get's the credit and this would have been impossible for me to do without those pictures!
**The pictures are located at the bottom of this post.
---------------------------------
This part is going to be under the driver's seat if you didnt know.


I started by taking off the hose clamps and taking off the air inlet.


I started off with detaching all the small hoses to the EGR modulator matix and 2 bolts to remove.
I then went to take off the air inlet duct (4 nuts, with throttle cable bracket). As you see in the above picture, it was plugged and dirty.
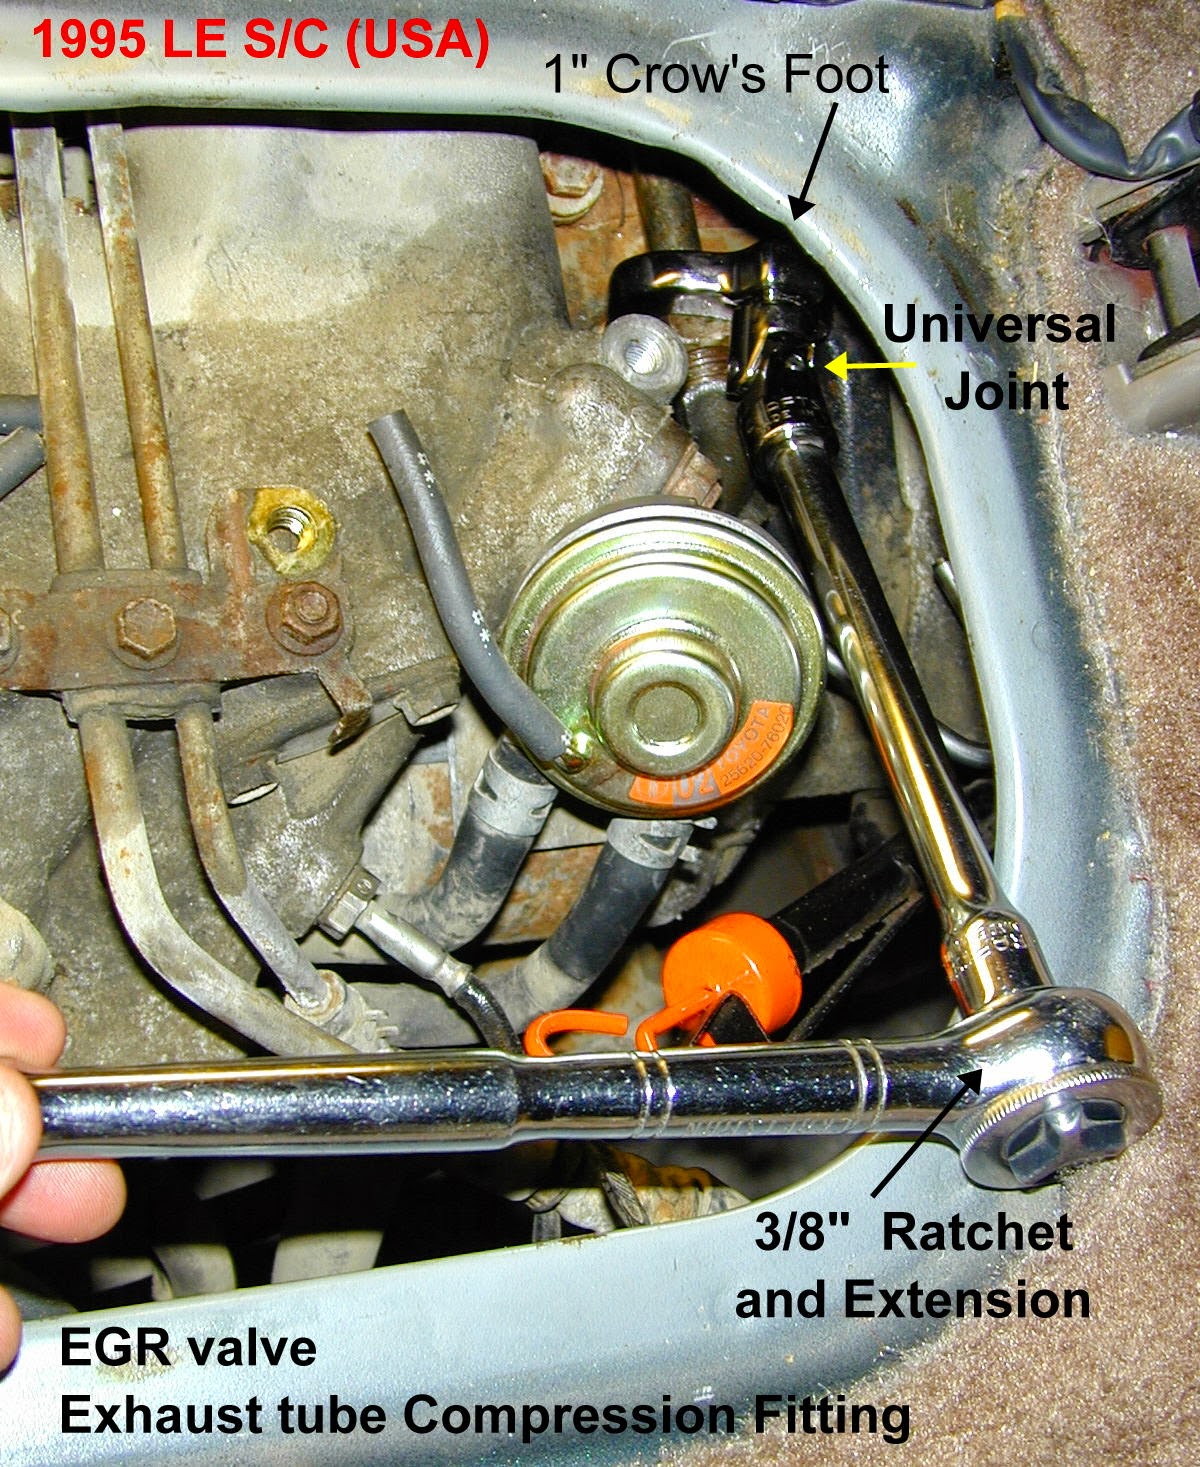
With the EGR system and dis-assembly, I followed zenseeker's info to the T. I didnt have a 1" crow's foot for the EGR pipe union nut, so I ended up buying a set just for it (Craftsman - $50) On a side not, I think the shop I went through put anti seize on pipe, which was helpful.
I dont know why, I had issues with the nuts for the EGR valve itself, especially the one underneath. 2 hoses and getting a coolant shower and it was out.
My EGR valve wasn't dirty and the EGR modulator worked fine.
Also took out the temp sensor and cleaned of the tip.
Worked on the plugged portion with 50 state legal carbon cleaner (I am environmentally conscious), which means this stuff wasn't as powerful. Pulled out the turbo snake and got some gunk out. Blew carb cleaner and canned compressed air through the other side to get as much as possible out.
Reverse and everything is good to go. Test drove and no CEL and a bit smoother as far as idling.
-----------------------------------------
ZENSEEKER'S DIY PICS!!!
http://zenseeker.net/Previa/PreviaMaintenance.htm


.
Parts:
- EGR intake gasket - 25628-76010 - this is on the far right side next to the exhaust.
- EGR valve gasket - 25627-76010 - used for the EGR valve to the intake manifold.
-Air inlet duct gasket - 22273-76010 - this is where the air goes into the intake manifold and where the EGR port gets plugged.
1 container of coolant
I followed Zenseeker's photo's on every single detail. If you haven't visit his website (http://zenseeker.net/Previa/PreviaMaintenance.htm) Zenseeker get's the credit and this would have been impossible for me to do without those pictures!
**The pictures are located at the bottom of this post.
---------------------------------
This part is going to be under the driver's seat if you didnt know.
I started by taking off the hose clamps and taking off the air inlet.
I started off with detaching all the small hoses to the EGR modulator matix and 2 bolts to remove.
I then went to take off the air inlet duct (4 nuts, with throttle cable bracket). As you see in the above picture, it was plugged and dirty.
With the EGR system and dis-assembly, I followed zenseeker's info to the T. I didnt have a 1" crow's foot for the EGR pipe union nut, so I ended up buying a set just for it (Craftsman - $50) On a side not, I think the shop I went through put anti seize on pipe, which was helpful.
I dont know why, I had issues with the nuts for the EGR valve itself, especially the one underneath. 2 hoses and getting a coolant shower and it was out.
My EGR valve wasn't dirty and the EGR modulator worked fine.
Also took out the temp sensor and cleaned of the tip.
Worked on the plugged portion with 50 state legal carbon cleaner (I am environmentally conscious), which means this stuff wasn't as powerful. Pulled out the turbo snake and got some gunk out. Blew carb cleaner and canned compressed air through the other side to get as much as possible out.
Reverse and everything is good to go. Test drove and no CEL and a bit smoother as far as idling.
-----------------------------------------
ZENSEEKER'S DIY PICS!!!
http://zenseeker.net/Previa/PreviaMaintenance.htm
.
Comments
Post a Comment